How to Set Up an Accessory Drawer with Dividers
A nine-step project that turns one cluttered drawer of small accessories into a divided drawer: empty, edit, measure, sketch, choose dividers, fit them, load one kind per compartment and adjust.
At a glance
What you need
- Tape measure
- Paper and pencil
- Scrap cardboard and scissors
- Small boxes you already own
- Drawer dividers or modular trays
- Non-slip drawer liner (optional)
- Donate box
One drawer usually ends up as the place where small things go to get lost: belts, sunglasses, a watch, hair ties, spare buttons, a scarf or two. Every time the drawer opens and closes, the contents shift, and soon you are stirring through it with one hand.
Turning that into a tidy accessory drawer is a small project you can finish in an afternoon. The method is to decide what belongs in the drawer, measure it, plan compartments on paper, and only then fit dividers. Most of the work happens before anything goes back in.
What you will need
- A tape measure
- Paper and a pencil
- A clear surface, such as a bed or table, for sorting
- A donate box and a trash bag
- Scrap cardboard and a few small boxes you already own, for a trial layout
- Dividers, chosen in step 5
- A non-slip drawer liner, if items slide
Steps 1 to 3: empty, edit and measure
- Empty the drawer and group by kind. Take everything out and wipe the drawer. Put like with like on your sorting surface: belts together, sunglasses together, jewelry together, and so on. Things that are not accessories at all go back to where they belong.
- Edit. Remove anything broken, anything with a missing partner and anything you no longer use. Then count each group. The counts tell you how many compartments you need and how large each must be.
- Measure the inside of the drawer. Measure the inside width, the inside depth from front to back, and the inside height from the drawer floor to the top edge of its side. Measure at the narrowest points, since some drawers taper or have rounded corners. Write all three down.
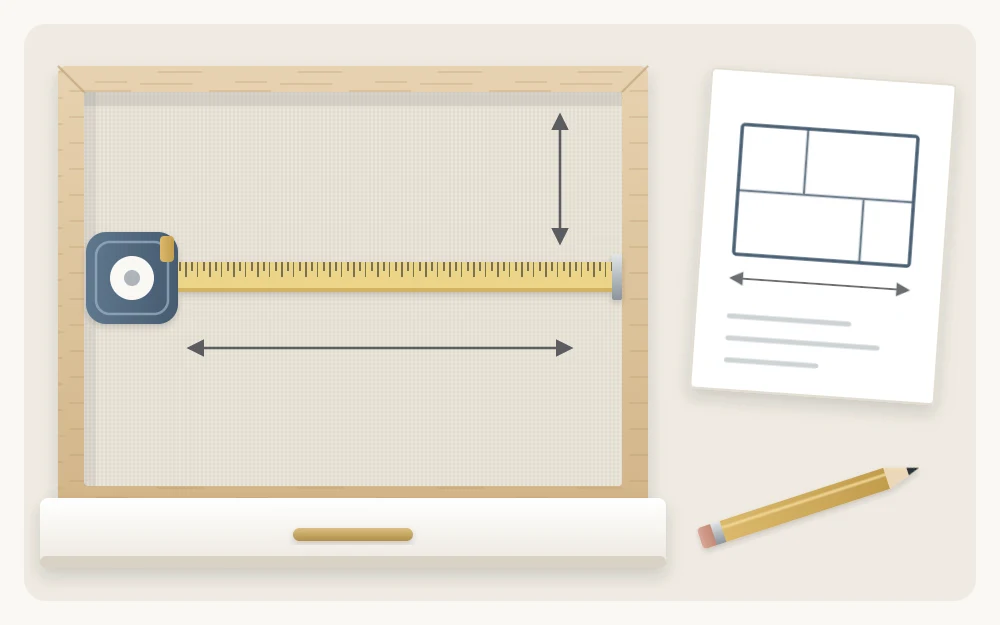
The height matters as much as the other two. A divider taller than the drawer’s inside height will stop it from closing, and one much shorter lets items slide over the top.
Step 4: sketch a layout
- Draw the drawer and place the largest groups first. Draw a rectangle for the drawer as seen from above and mark the front. Give the bulkiest group its compartment first, then the next largest, and fit the small ones into what remains. Rolled belts or folded scarves need the most room; rings and earrings need the least.
Measure a few items to check your sketch against reality. A rolled belt, a sunglasses case and a folded scarf each have a size you can measure in seconds, and a compartment a little larger than the item is what you are aiming for. Put the kinds you use most at the front of the drawer, where you can reach them without opening it all the way.
Step 5: choose dividers
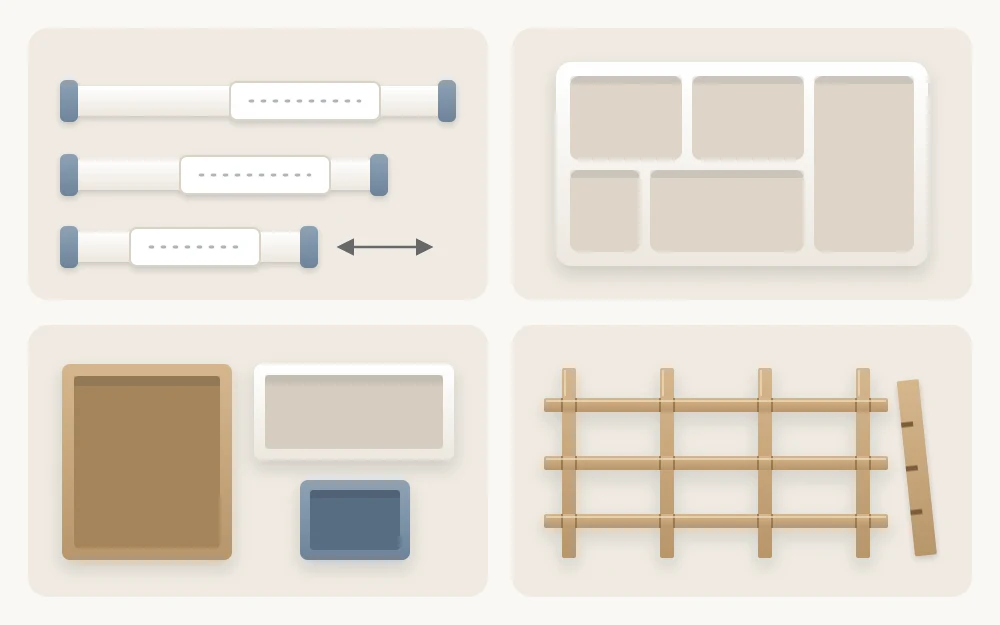
- Pick the divider type that matches your sketch. There are four common kinds, and they can be mixed.
- Adjustable spring-loaded dividers. Bars that extend to press against the front and back, or the two sides, of the drawer. They make long lanes and suit rolled or folded items. Check that their length range covers your drawer’s inside measurement.
- Modular trays. Separate trays in different sizes that sit side by side. They suit small items and can be lifted out one at a time. Add up their widths and depths against your measurements before buying.
- Small boxes you already own. Gift boxes, lids and shallow containers cost nothing and work well if their heights are similar.
- Cut cardboard. Strips cut to the drawer’s inside height, slotted together into a grid. Best as a trial, though a neat one can stay.
Tip
Test the layout with cardboard or boxes you already have before buying anything. A few days of use will show whether a compartment is too small or in the wrong place, and changing a cardboard strip costs nothing.
Steps 6 to 8: line, fit and load
- Line the drawer if items slide. A non-slip liner cut to the inside width and depth keeps trays and boxes from drifting when the drawer moves. Skip it if your dividers press firmly against the sides.
- Fit the dividers. Set them in place following your sketch. Open and close the drawer a few times to check that nothing catches on the frame above and nothing shifts.
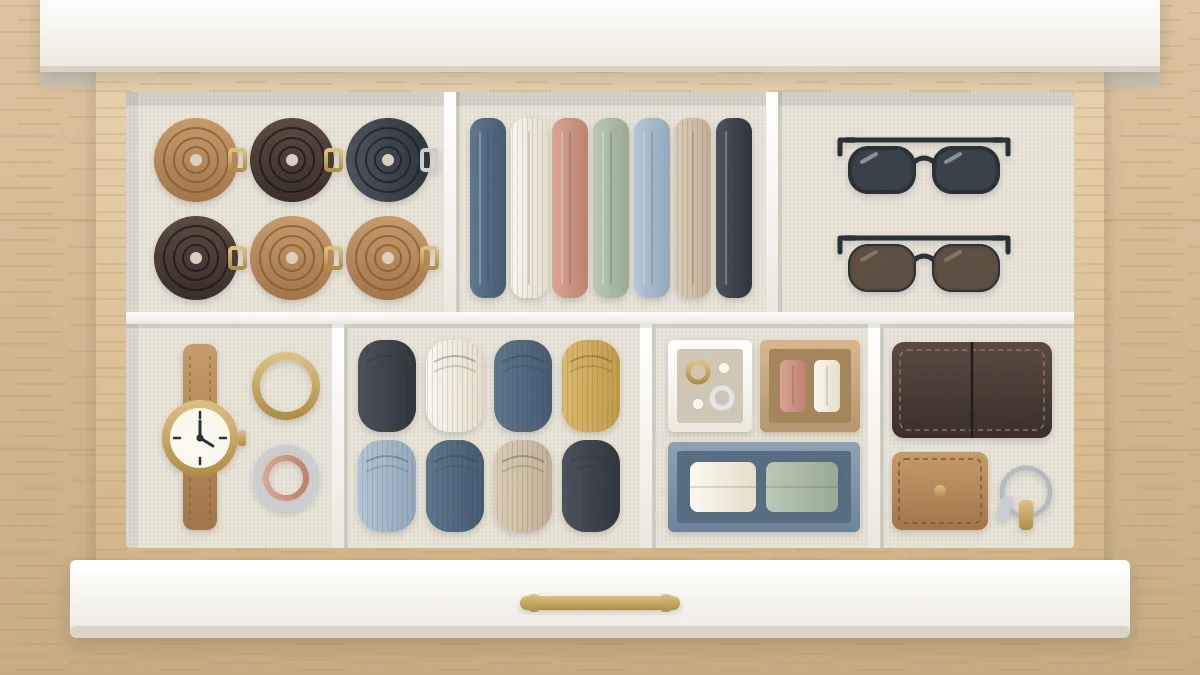
- Load one kind per compartment. Put each group in its compartment, with the most used kinds at the front. Keep everything in a single layer: roll belts and stand the rolls on their sides, and fold scarves so they stand on edge like files in a row, which is known as file folding. If a group does not fit in one layer, it needs a larger compartment or fewer items, not a second layer.
Leave one compartment empty. New items arrive sooner or later, and an empty space gives them somewhere to go that is not on top of something else.
Step 9: live with it, then adjust
- Use the drawer for a week and note what goes wrong. Look for a compartment that overflows, one that stays half empty, and any item that keeps landing on the dresser top instead of in the drawer. Move a divider, swap two compartments or resize one. Adjusting after a week of real use is part of the method.
Keeping the drawer shallow in content
The drawer works only while nothing is buried. If you have to lift one item to see another, the drawer holds too much. Move the overflow to a second container, using the same kind-by-kind approach described in the guide on how to organize accessories in a closet.
The same rule, a single visible layer, applies to clothing; the guide on how to organize clothes in drawers explains it for T-shirts, socks and underwear.
An optional label
If more than one person uses the drawer, or it holds many similar small boxes, a small label on the inside edge of the drawer or on each box helps things go back to the right place. It is optional; in a drawer you open every day, the compartments themselves soon become familiar. The guide on how to label closet storage covers label types and wording.
Frequently asked questions
What kind of drawer dividers work best for accessories?
It depends on what the drawer holds. Adjustable spring-loaded bars make long lanes for rolled or folded items, while modular trays and small boxes suit jewelry and other small pieces. Many drawers use a mix. Measure the inside width, depth and height first so whatever you choose fits.
Can I make drawer dividers from cardboard?
Yes. Cut strips to the drawer's inside height and slot them together into a grid, or simply use small boxes you already have. Cardboard is especially useful as a trial layout, because you can change it for free after a few days of use before deciding on anything permanent.
How deep should an accessory drawer be?
Shallow is easier, because small items stay in one visible layer. If your only drawer is deep, keep the contents in a single layer anyway, or use stacking trays where the top tray lifts out. Measure the inside height before choosing dividers so the drawer still closes.