How to Measure a Closet and Plan the Layout
Measure a closet properly before buying shelves, organizers or bins: draw two sketches, record eight sets of measurements, count what you own by length group, and turn the numbers into a layout on paper.
At a glance
What you need
- Retractable tape measure
- Paper and pencil
- Clipboard or firm backing
- Stable step stool
- Flashlight
Most organizers that end up unused were bought by eye. The shelf unit is slightly too wide for the opening, the bins are too deep for the shelf, or the second rod leaves shirts brushing the floor. Knowing how to measure a closet, and what to write down, prevents all three.
This is a paper project. You need half an hour to an hour, depending on the size of the closet and how much it holds, and you finish with two sketches, a short inventory and a layout you can check any product against.
What you need
- A retractable metal tape measure
- Paper, a pencil and something firm to write on
- A stable step stool for the upper measurements, used as its instructions describe
- A flashlight for the corners
Empty the floor of the closet first so the tape can lie flat. The clothes can stay on the rod for now; you will count them later.
Draw two simple sketches
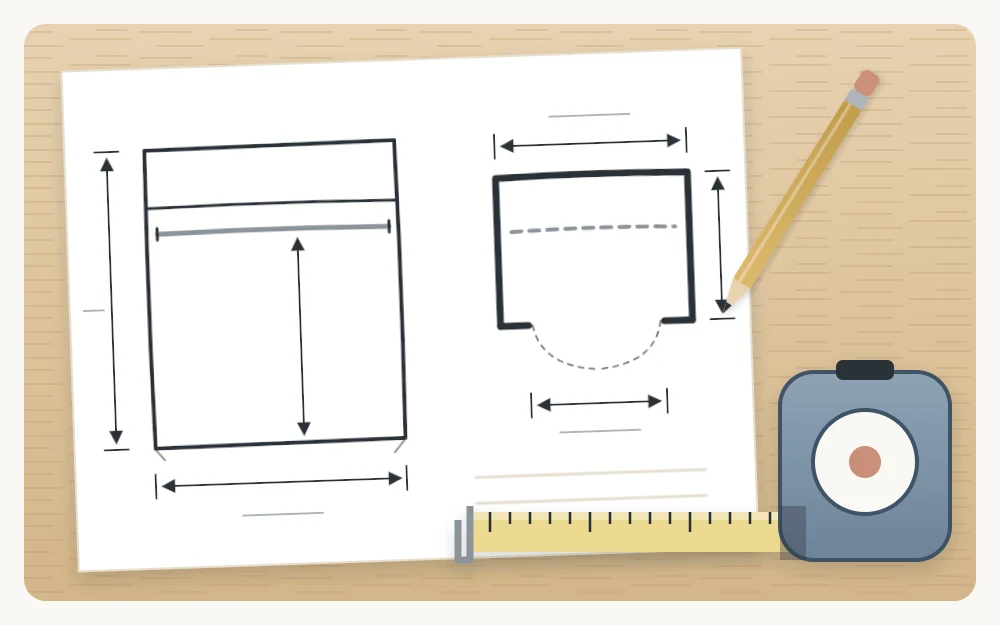
Before measuring anything, draw the closet twice. They do not need to be to scale.
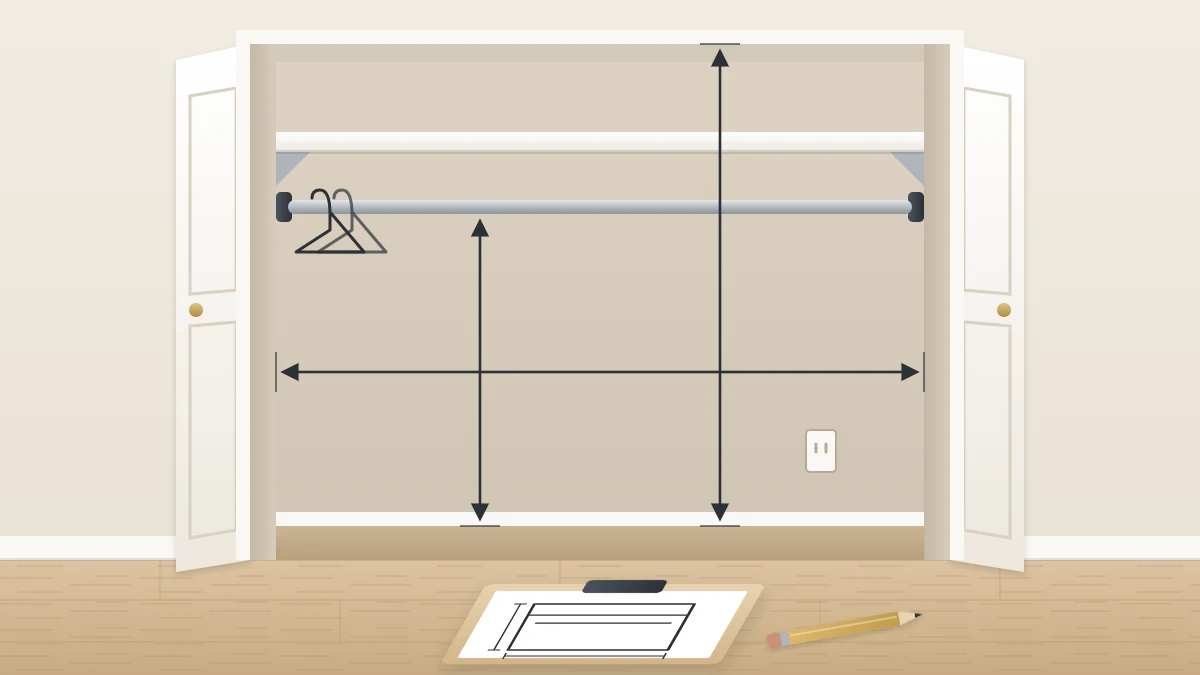
- A front view: the closet as you see it standing in the doorway, showing the back wall, the rod, the shelf and the floor.
- A top view: the closet seen from above, showing the back wall, the two side walls, the opening and the doors.
Every number you take goes onto one of these sketches, on a line showing what it measures. A list of loose figures is easy to mix up a week later in a store.
Measure the closet, step by step
- Width. Measure the back wall from side to side, then measure the opening. In a reach-in closet (a shallow closet you stand in front of, not inside) the two often differ, because the opening is narrower than the interior.
- Return walls. These are the short sections of wall on each side of the opening, between the door frame and the side wall. Measure each. Anything stored behind them is harder to reach.
- Depth. Measure from the back wall to the inside face of the closed door or the door frame.
- Height. Measure from floor to ceiling.
- Door opening. Measure its width and height. Anything large has to pass through it.
- Existing rod and shelf. Record the height of the rod from the floor, the height of the shelf, the shelf’s depth, and the rod’s distance from the back wall.
- Baseboards. Note their height and thickness. A unit that stands on the floor cannot sit flush against a wall with a baseboard.
- Anything in the way. Mark the position and size of switches, outlets, access panels, vents and any sloped section of ceiling.
Tip
Measure every dimension in two places, for example the width near the floor and again near the shelf. Walls are rarely perfectly square. Write both figures down and plan with the smaller one.
Note the doors
How the doors open changes what you can use. Write on the top view which type you have and what it needs:
- Hinged doors swing into the room and need clear floor in front, but give full access to the opening.
- Sliding doors cover part of the opening at all times, so anything that pulls out must clear the door that is in front of it.
- Folding doors stack at the sides when open and take up part of the opening’s width.
The guide to reach-in closet organization looks at how each door type affects the layout.
Take an inventory of what the closet holds
The closet’s size is half the plan. The other half is what has to fit in it, and that is specific to you.
Hanging clothes
Sort the rod into three length groups: short (shirts, folded pants), medium (jackets, skirts) and long (dresses, coats). For each group, count the items, then push them together comfortably and measure the length of rod they use. Finally, measure the longest garment in each group from the top of the hanger hook to the hem.
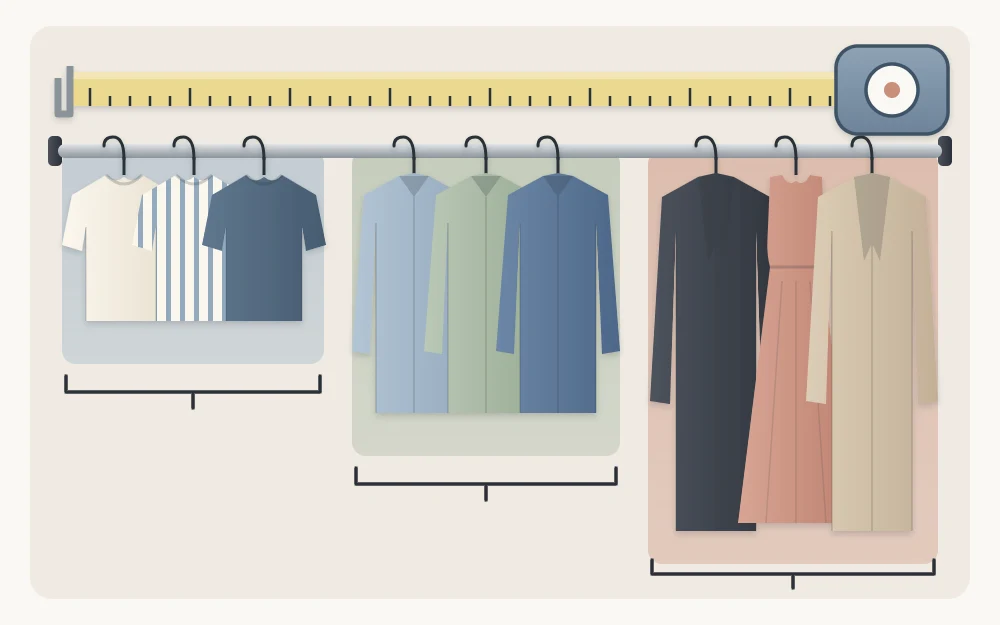
Clothing sizes and hanger widths vary, so measure your own garments and hangers rather than trusting a standard figure. Measure your widest hanger with a garment on it, and compare that with the closet’s depth.
Everything else
- Folded stacks: count them and measure the width and depth of a typical stack.
- Shoes: count the pairs and note any tall boots.
- Bins and boxes: count them and record their sizes.
- Bags, belts and other accessories: a rough count is enough.
Turn the numbers into a layout
Now compare the two halves. From the inventory you know how much rod each length group needs. From the sketch you know how much wall there is.
Long-hang space is a single rod with clear room beneath it for full-length garments. Double-hang space is two rods, one above the other, for short items, and it gives two lengths of hanging in one width of wall. If most of your hanging clothes are short, double-hang usually makes better use of the closet. Check it against your own figures: the two longest short garments, plus a gap, must fit between the floor and the upper rod.
Mark on the front view how much width goes to long-hang, how much to double-hang, and how much to shelves and shoes. Add a little slack to each rod length so hangers can slide. The guide to closet shelves and rods covers the options in more detail.
Check products against your numbers
With the layout drawn, shopping becomes a comparison. For each product, set its outside dimensions beside your figures and leave clearance: room for a drawer to open, for a bin to tilt out, for the door to close, and for the item to pass through the door opening in the first place.
Good to know
For any system that is fixed to the wall, the manufacturer’s planning guide and installation instructions decide the spacing, the fixings and the loads. Follow them, and ask the manufacturer or a qualified installer when unsure.
Keep the sketches. They are the starting point for the full process in how to organize a closet, and they save measuring again the next time you change anything.
Frequently asked questions
What measurements do I need for a closet organizer?
Record the width at the back wall and at the opening, the depth, the height, the door opening, the return walls beside it, the position of the existing rod and shelf, the baseboards and any obstacles such as switches or vents. Take each one in two places and plan with the smaller figure.
How do I work out how much hanging space I need?
Sort your hanging clothes into short, medium and long groups. Push each group together comfortably and measure the length of rod it uses, then measure the longest garment in each group from hanger hook to hem. Those figures show how much long-hang and double-hang space your own clothes need.
Why should I measure a closet in two places?
Walls, floors and ceilings are rarely perfectly square, so the width near the floor can differ from the width near the shelf. Measuring twice and using the smaller figure means a shelf or unit chosen from your notes will fit at the tightest point.